

Hello and welcome again on my next installment of "What Does An Art Student DO? the series". As I mention before on the VER 0.3, I promised u to post on how to draw a perspective drawings didnt I? But since my perspective drawing artwork is somewhere on my storage room atm so it will take time for me to search for it. SO, as for the time being I will show you guys what I did on my past assignment which is was also my final project for FND101 VISUAL RESEARCH. SO from this post and forth I will be posting my past artworks (my 1st semester artworks) up until my current one so I wont miss a single piece of my work.
So as for todays post, I will be showing u guys one of my greatest masterpiece and one of my personal favorite too, I call it my self "THE SORROW" =D

haha, so u guys must be wondering how did I make this awesome thing aite?? Hmm it is simple actually and you guys wont believe if I said that this thing is actually made out from a GREEN FOAM that we usually use for placing man made flowers.

YEah this piece of green thinggy is what it made of, even my self thinks it was impossible at first but then again in the world of arts, creativity could create many possibilities.
SO my Task?? In this assignment we are learning about the topic FORM. SO a brief explaination of FORM is, FORM is some thing that looks like a 3 dimensional shape, that has a weight, height and depth. SHAPE and FORM comes together as to create an illusion as the drawings are made real. SO in this task I have to make a 3Dimensional Shape Sculpture that was made of foam. We didnt use clay as to avoid from overcosting our money. What did I use on this task?
1) I use 5 Blocks of Green Foam

2) Some Sand Papers to sculpt the foam

3) All purpose Cutting Knife to cut a large partition on the foam

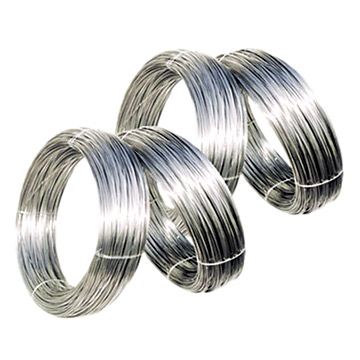
4)A roll of Steel Wire for making the Body anatomy and for making pilings.
5) A can of white Emulsion Paint for hardening the sculpture.

6) A can of Silver Spray for the final touch ups

7) And lastly some modelling clay for making a small scale Mock-Up

OKAY, SO the first thing I have to do is to find a subject matter so that I can create ideas from it and also for the syllibus needs. What did I pick for my subject matter? Here it is...
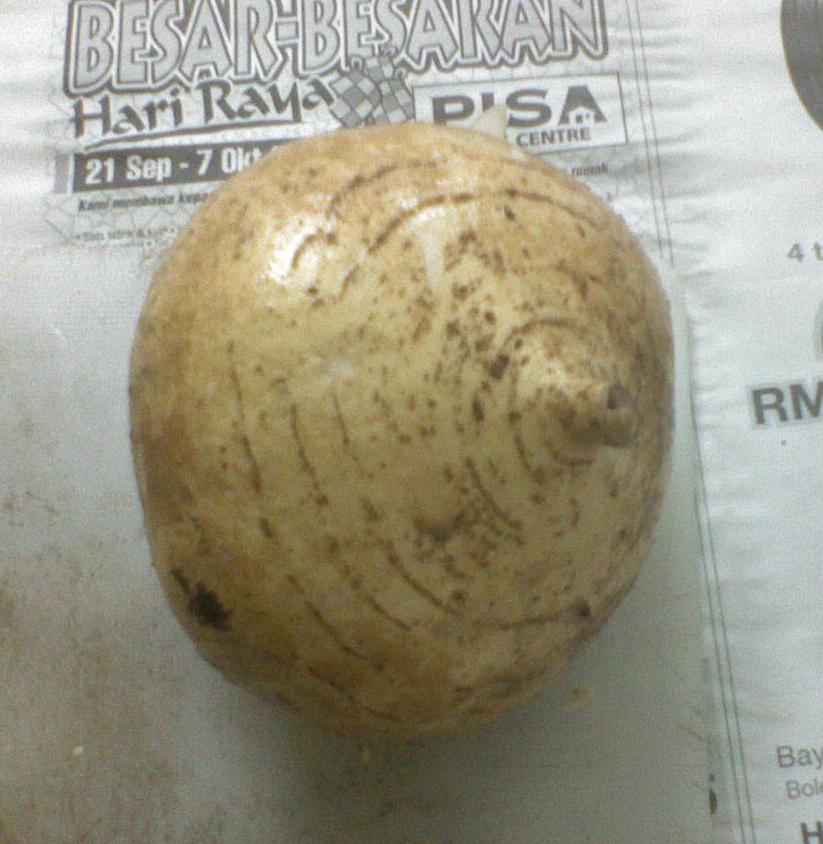
YEP, a YAM BEAN a.k.a Sengkuang =P
Okay, so u guys must be wondering,,how did a YAM BEAN ended up being a Dragon Like sculpture? Idea development a.k.a perkembangan idea in arts. Sometime a sculpture dont started out like in the final form. It has gone through numerous ideas development and thats Basic Art 101.
SO these are the sketches that I have drawn for the Idea Development.


SO the above ten steps that I have drawn is for the "Inverted Form". Simple explaination, a FORM that has gone through a small changes but still has the Original form of the subject matter.
So my lecturer wants our final project to be an abstractive Form sculpture. So another process of idea Development that I made for the Abstract Form.


See the differences? As I taken the form of the inverted Form drawings and I carried on forward developing more ideas and it ended up to this 10th Step of Abstract Form.
so I have done the drawings,
The next step is....MAKING THE SCULPTURE =D
so my first step is.....to divide and cut the foam according to the partition I have scaled. SOrry I dont have any photos on how I cut the foams cuz I was too busy with the work. So roughly for both arms I use 1 block cuz I cut the block in half so I got an even partition for both arms. As for the body I use the whole block and I craved it by only using the sand paper. Sounds like a whole lot of work wast it? WELL YES IT IS =___= My whole room was in a total mess and feel sandy all around. But for the sake of Good GRADES, the mess will have to stay behind.
SO after all the cutting and scrubbing (I dunno if I use the right words here. LoL) It is time for some paint work to do =D I like painting stuffs though Im not really that good in paintings. =P

SO this process is only for hardening the foam and to give a solid feel to the foam. After covering all the foams with the Emulsions, I have to wait for it to dry and it was approximately around 1 hour under a fan condition. Though I had to add some more layers of emulsion to give more solider surface so it will be more sturdy.

The Drying process. Well as u can see there I got the Head, Back Spike, Left and Right arms and the Tail. The Legs I have to glued em first cuz I need them to be rock hard and stick to the body part as strong as possible.
As I waited for the paint to dry I move on to the next step of work.
MAKING THE CLAY MOCK-UP =D
The above is for the FINAL FORM/OBJECT so my lecturer wants a Mock-Up version of it too. So to make it, I use a cheap modelling clay that we used to play when we're 3 =D (Totally reminds me when I was a kid) I used 5 modelling clays, 2 for the INVERTED FORM n 3 for the ABSTRACT FORM. So here is the models that I have made,


(Abstract Form Model Clay)

(Inverted Form Model Clay)
Spent a whole lot of hours just for making these two models. So after getting my hands all messy and dirty, my painted foams have dried up and it is time for the final touch ups.

I have assemble all the parts and glued them together with some steel wire pilings, they are ready to be sprayed. =D
So after some few layers of spraying, and gone through the whole night of drying this is the final Form of my Sculpture.


PHEWWW...finally the Task has done, and guess how long did i take to make this sculpture a real deal?? After plus minus sleep, going to class and everything, It took me nearly 3 days to finish all of these tasks including the drawings. On the last day It took me sleepless to make sure that this task is in tip top condition to be accessed.
So the day has come for the ACCESSING DAY, to put it simple it is the dateline for us to send the artwork and to be given marks on the spot. SO what did I get?? Well I did get good marks but my scuplture seems a little off topic but that need not to be the case here. anyways below are some of my friends artworks =D


Well, what do you guys think? Awesome isnt it. If u interested on making one too then I wouldnt mind showing u guys how and I will personally to u how. So I guess this is it, there are more yet to come on my next installment of "WHAT DOES AN ART STUDENT DO?? The Series". I will showing you guys another model of sculpture but it was totally made out of mounting board. Want to know how? Till the next post Doods =D
No comments:
Post a Comment